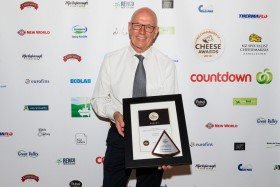
Tony Hamblyn – 2018 winner Home Crafted Cheesemaker making the best Home Crafted Cheese – New Zealand Specialist Cheesemaker Awards 2018
One comes in contact with the most fabulous people and at last night’s NZ Specialist Cheesemaker Annual Award celebration Neil Hamblyn turned out to be an absolutely winner. What a fascinating man – on the right side of his brain Air NZ Pilot and on the left side of his brain – that very creative area – a man with a mission – a man who excels at making cheese.
Have a read of Tony’s story which appeared a few months ago in A Better Whey Cheesemaking.com
Tony Hamblyn in New Zealand
Tony is an airline pilot, flying the B787 Dreamliner for Air New Zealand. He flies to Asia, Hawaii, South America, and Australia. He told us: “It’s been an awesome career which has given me a great lifestyle. I’m very lucky to have blocks of days off which gives me time to be able to make cheese, etc.”
How did you get interested in making cheese?
It could be that my childhood influenced where I am today. My grandparents had a dairy farm which we went to lots. Here, the milk was pumped into a holding vat and then ran down the outside of a heat exchanger before being pumped into a large tank for the dairy company to take away. There were occasions when they had to separate the cream from the milk and just send the cream in cans to the city, as it was too expensive to ship the milk to a distant factory. The skimmed milk fed the pigs. I made a visit to the local dairy factory where they used to churn butter in a large wooden butter churn. The cream was “soured” to make a cultured butter, and then packed into 50 pound boxes for export. Of course, none of this happens today.
My introduction to working with milk was through a New Zealand yogurt kit, and when we moved to the country, cheese making became a natural extension of what we did. Making yogurt gave me a solid grounding in keeping things sterile, which is a critical part of the process. I was able to buy raw milk and cream, but that became an expensive exercise, particularly if things went wrong. I eventually found a way to get milk a bit cheaper, so making it became a viable hobby.
I now have a 5 acre lifestyle block and do have 4 dairy cows of my own, but as I am still working, I don’t bother to milk them. (In NZ we call a mini ranch/farm a lifestyle block. Some would call it a no lifestyle block, but I don’t see it like that.) I use them for raising calves to the weaning stage. In the future I intend to milk them. In addition to the cows, I have a pig, some sheep, and some beehives.
I use farm fresh milk to make cheese and am generally using 25-30 litres (26-32 quarts) at a time which I get from a friend who has a dairy farm.
What kind of cheese are you making?
My first attempt was to make some Camembert. I ended up with a cheese that had a bunch of green and yellow mould over it, so was clearly inedible. I phoned the author of the book I was using and to my surprise, I was able to speak with her and find out what my potential problem was. The second batch worked out just fine.
I then decided to try a variety of cheeses, and as I liked a washed rind cheddar, I thought about trying it, so off I went to make some. I discovered the cheesemaking.com website and found the recipes and instructions within the recipes to be a fantastic resource, and it is this recipe that I decided to use. The next issue to develop was – what do these cheeses look like as they mature? I had no idea if the moulds growing on the rind were good or bad, and no texts explained how the rind would develop. I did a lot of reading to find out what cheeses look like as they mature and I found there were no photos at all. Scary stuff for the novice.
What was supposed to be Havarti. I have rubbed it down with olive oil, hence the oily look on
top. The molds developed while in the fridge, even though the cheese was covered by upside-down bain marie pans.
Anyway, there is an artisan cheese maker not far from where I live, so I rang up and asked if it would be possible to swap some labour for knowledge. Lyn Haycock from the Glenbrook Cheese Company became a tutor/mentor over the next few months as I did a little bit of part time assistance in her creamery. I now had a mentor and guide with whom I could discuss issues around cheese making, as well as have someone independent to critique what I was making.
At this point, I’ve made Camembert (successfully), Havarti, Tomme, Feta, Haloumi, and Brick. I chose to make Brick my go-to cheese, because I wanted to master one cheese and develop expertise with it. We also don’t have a lot of it in NZ, so it was a good alternative to store bought cheese.
Finished blocks of brick ready to be brined.
It’s been an interesting challenge, because I’ve had a variety of end results. Some have had a really nice looking grey/brown rind, others have had so rind at all, but a soft orange surface, and others have had a bright orange surface which has created a seal so, as gas is produced in the cheese, it “blows up,” creating air bubbles under the rind. They have all tasted OK, but it’s been a real challenge to get consistency.
The brick after one week of washing daily with salt solution with a bit of the B.linens in it.
One of the brick cheese blocks ready to wrap. I’ve been advised that leaving the cheese at 21C (70F) for the length of time I have been, is possibly making the culture work vigorously, so creating a lot of CO2. After 7 days I placed the cheese in my fridge and have had no issues with excess gas. All going well, I will have a much better end product that looks something like the brick standard. The two blocks of cheese weigh a total of 4.25 kg (9.3 lbs), so its a pretty good yield.
Update: During the weekend I made another batch of brick using raw milk. I was inspired to do this because of the newsletter that came out late last week celebrating Earth Day and raw milk cheese. One very pleasing aspect of this is the process took 90 minutes less to go through because the milk was at 31C (88F) when I got it home. I have also had some advice from a friend who set up a very large creamery in NZ. They made a brick cheese, so his advice was very helpful. They didn’t put the B. linens into the milk, but only used it to wash the cheese. It was also his suggestion that the culture activity created the gas because the temperature I was keeping the cheese at was too high.
What’s your set-up?
I recently built a brewery with 70 litre pots (18 1/2 gallons), so I decided to adapt this to cheese making to maximize the use of it.
I removed the false bottom from the mash tun (centre pot) and then dropped a 50 litre pot (13 gallons) inside this pot with the handles resting on the rim. This creates a double boiler system, so all I then do is use my PID temperature controllers (in the black control box) to maintain the temperature I want. I’ve used this system to pasteurize milk at 72C (162F) as well as to maintain a low temperature after adding culture and rennet. The built in timer helps me keep track of the timing required by individual recipes.
The one change I would like to make is to lower the bench height to 60cm (24 in) to make access to the pots easier.
I pasteurize my milk before use to remove the variations of farm flora, even though I did make a brick with raw milk, which actually turned out to be delicious.
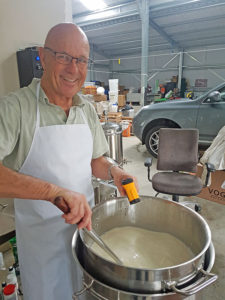
Here, I have a 35 litre (9 gallon) batch of milk heating up. It works on a double boiler principle. The water is heated in the pot just to the left of the control box and flows by gravity to the double boiler. The water is then pumped back into the boiler. Flow is regulated by adjusting the return ball valve. It takes over an hour to heat the milk up to 72C (162F), so, in future I will have to start the water heating before going to collect the milk.
I find the bain marie trays to be really useful to maintain a micro climate for my cheese within the fridge and also protect them while salting, etc. This is how I use the bain marie pans to create a reasonably sterile environment so my cheese can stay at room temperature for a week to 10 days as per the recipe.
What are you using for your cave?
My cave isn’t that exciting. I just bought a 3 door shop display fridge, which is going to give me the capacity to store a large number of cheeses. I will have to build a temperature control system for it, as it can only control up to 8C (46F) at the moment.
My “cave” is a three door glass fronted display fridge as used for sodas, etc. I have just finished making a controller to raise the temperature to 13C (55F), and to add humidity to it. As you can see, I am also using it to cold crash my beer.
Are you planning to sell your cheese?
There are too many regulatory hoops to go through over here, so I’m just making cheese as a hobby for my own use, and to give to friends.
I don’t intend to run a commercial operation, but I do want to make a cheese that is of a high standard. I want to enter the NZ cheese awards, primarily as a means of bench marking my progress.
Well Neil did enter the Cheese Awards and won!
The NZ cheese awards is an event run by the NZ Specialist Cheesemakers Association generally for commercial cheese makers, however there is a section for hobbyists. To me, this is an excellent opportunity to have experts evaluate what I make, as every cheese submitted gets constructive feedback.
Do you have any goals for your cheese – anything you aspire to do in the future?
I’m 65 this year and am still working in my career, so I don’t really want to bother with a large scale operation. I enjoy the hobby aspect of what I’m doing and have the freedom to experiment with a variety of cheeses.
Until recently I had stopped making cheese because I was building a barn and I needed the space in my house for other things. At the same time, the fridge I was using stopped working, so I figured that waiting to have the right equipment would be sensible. I’m building a basic kitchen in my barn which I will use to make all my home grown products.
I now have a fridge that is more than capable of storing more cheese that we can eat, which is fantastic. As with all fridges, it gets too cold, and is quite a dry atmosphere, so I am building a controller to maintain a specific temperature and humidity. It’s a very simple thing to make, particularly after making the home brew system.
Lately, my neighbor has shown interest in cheese making, and she has also spent a day with Lyn. I have now made three lots of cheese with her using my equipment, so it’s been really worthwhile and enjoyable being able to share my very limited knowledge with someone who wants to make their own cheese. The journey can only get better.
One other thing I should mention is that one of my goals with cheesemaking is to visit Widmers Cheese in Wisconsin to learnabout how their Brick is made. I’ve made a lot of them and enjoy the flavour, even though I’m struggling to get consistency with the finished cheese. It’s a heck of a challenge to get consistent results because up until recently I haven’t had the ability to remove a lot of the variables from the process. I am hoping that a visit to their creamery will give me a better idea of what to look for, particularly during the ageing process.
Do you have any other hobbies?
Not really. I play golf, and also process my sheep and pigs. So I end up making sausages, salami, and dried meats such as coppa.
I guess you would call it creating an artisan lifestyle. When you think about it- making cheese, beer, wine, and salami is a very similar process: it’s about using a culture to create a different product through enzyme action. I think this it what is so enjoyable about making each of these foods. And then, it’s very satisfying eating the end product.
*I was looking for filter cloth in a hardware area in Shanghai and in that shop was a whole lot of stainless steel sheets. One that caught my eye was some small thin perforated sheets that were 50cm x 50cm. I drew a diagram of a mold and an hour later I had my mold. It needed modifying, so on my next trip I had better plans so had the two brick molds made. It only took an hour to make them. I’ve used them a few times, and friend who makes artisan cheese also used them. They work really well, and I end up with a cheese that is ready to wrap in foil.